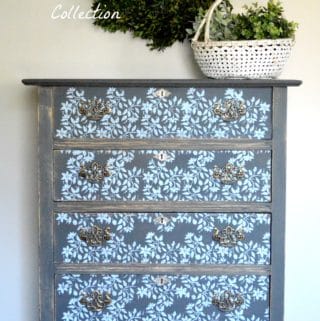
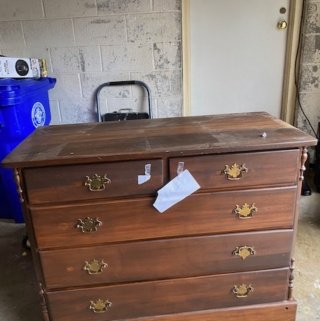
I don’t know if you recall, but this sweet little chest was my favorite find Monday last month. 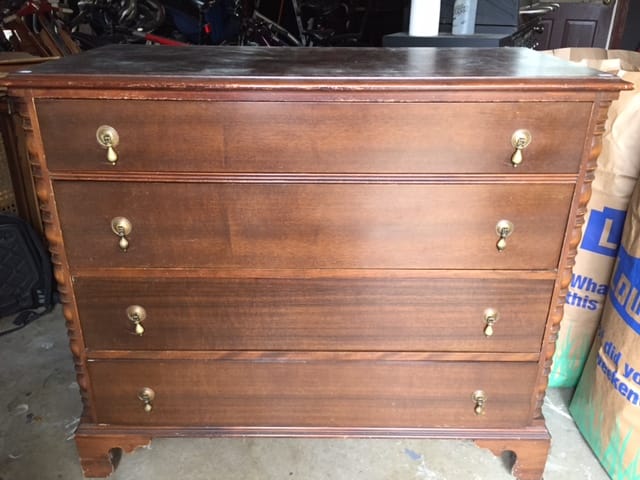
General Finishes kindly sent me a sample package of their new product, Chalk Style Paint, a few weeks ago and I chose this piece to try it out on. 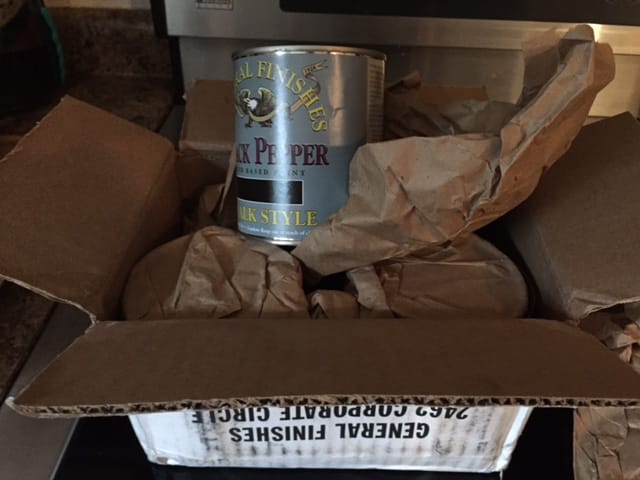 I mixed their Black Pepper with Empire Gray to create a gorgeous, deep gray. Almost slate but it doesn’t have much blue in it. I applied two coats and then lightly dipped my bristles into the black and brushed over the piece in places. It almost gives it a glazed effect and is just gorgeous!
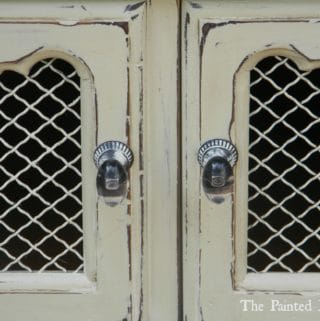
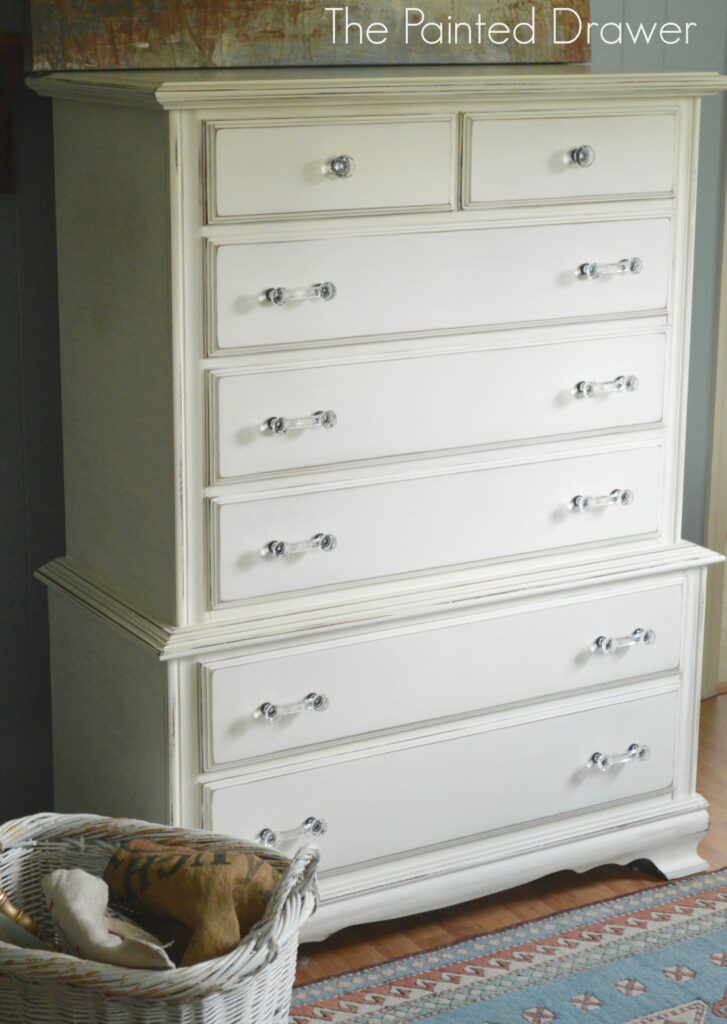
Here is a sneak peek 

To seal the chalk style paint, I used General Finishes Flat Out Flat Topcoat. It is water based and easy to apply with a sponge brush. No waxing needed over this paint which is a nice break. However, it does not give the same look as a hand rubbed wax gives. It is much more slick and refined.
I enjoyed working with the paint immensely. It went on smoothly, mixed easily and distressed well. I give it two thumbs up!
I’ll share more before and after pics tomorrow!
very pretty! love the hardware on this piece!
Thanks, Cassie! I know – I just fell in love with it.
What a lovely colour, I love what you have done……
I love this piece! When you mixed the colors was it 1/2 and 1/2? Gorgeous
Hi Diane, yes it was about 1/2 and 1/2 with the black added at the end by almost dry brushing it on. Thanks!
love that color! i was wondering if you would do a post where you go through a “step-by-step” photo tutorial on what it looks like as you’re painting it, then the before and after of when you wax it! you always do such a great job! love your blog!
Love it!
Love the result. You did a great job. Like the idea of not waxing. Will look for their products. Thanks for sharing…..happy holidays
Wow…Wow….Wow Suzanne!!!!
Really was surprized how much I love this effect. How did you do the side carved distressed look? (Edge pieces on ends.) Lightly brushing paint on? Love it….great job.
Thanks so much for sharing with us,
Sincerely impressed.
Marcie
Beautiful! Thanks for your review of the paint and topcoat. Love the color.
That is just beautiful! I also like wax, but the finish on here looks great. Thanks for always sharing Suzanne.
Hi Mimi, yes, the finish is different and just as beautiful as wax but it really is a different look. Hard to show in the pics Thanks!
Did you have to do any sanding before you started painting? We have used AS chalk paint but the wax is time consuming. What consistency is the GF top coat? Beautiful piece.
Hi Linda, no sanding needed. No primer. The GF top coat is a liquid and gives a totally different look than wax. You need to try it to see I am a fan now!
Thank you! I have been frustrated lately with Painting finishes results…
I am in Argentina, basically I have to struggle with ready to use materials!
Have a nice day! and Thank you, you encouraged me to keep on.Fernanda
You are very welcome!